

Introduction
Harmonograph-VR has been created as a hybrid tool and artistic experience to work in parallel with my project for Computational Arts-Based Research and Theory.
Design and Implementation
The design and implementation of the experience, followed an agile development pattern, where features were identified for build, and then built - this allowed for iteration of the design with basic testing - primarily by myself. As a result the following discussion covers both of these, and anything found as a result of iterating the design.
The VR Application
The short essay defining a test bed on my project site, introduces the pseudo physical basis of how I will restage the work of John and James Whitney. In it rotor systems are created, which move objects in deterministic patterns, which to the observer - especially when limited to 2D, create mesmerizing and difficult to predict patterns.
Platform
Software
I wanted to create an application which was easily consumable by anyone who has a headset of some kind (see the following section on hardware), and even has some level of accessibility to those without as well. Using a web based application was especially attractive, as there are opportunities for making the application hardware agnostic. This is currently available through the use of the WebXR API which provides input and output capabilities from headsets to deliver and host VR and AR experiences on the web. There are a number of frameworks that can make development of WebGL and WebXR easier - after a quick evaluation, I identified a choice between;
I had already been using threejs to provide examples when a 3D context was required, as it's especially easy to work with both imported assets, and perhaps more importantly to myself, be able generate geometries more programmatically, thus allowing for generative and reactive qualities in them. A-Frame builds upon threejs, adding some specific VR components, especially in the space of working worth input data - and although new to me, would be a sensible step on from threejs for this project.
There was also a technical restriction, as a Apple based developer, the current state of VR support is somewhat woeful - including a lack of support for WebXR natively in the WebKit browsers - a major limitation if looking to deliver VR content via Google Cardboard. A-Frame adds an addtional factor over threejs, by providing a WebVR Polyfill for browsers which do not support the API - thus allowing a greater number of devices to consume the application.
Development took place using Visual Studio Code, using the Go-Live plugin to provide a local web host for testing, using the A-Frame framework, with some packages from the superframe collection for pre-packaged features. The application is available on the internet at harmonograph-vr (and can be seen directly below), hosted using Netlify with scripting by Grunt to assemble the build files into a distribution folder.
Hardware
I had originally intended to develop the application to work on Google Cardboard, and on the HTC Vive headsets - with the Cardboard version providing a slightly more limited / clumsy experience. Unfortunately, as previously discussed, changes in the VR landscape with regards to Apple Hardware have made the use of the Vive extremely problematic - and with current constraints - means I have not been able to find a machine capable of running the headset.
As a result I have focussed the application on running on Google Cardboard alone - though I hope to get some testing feedback from some friends who have Oculus Quest handsets, and should be able to use the application via the built browser of the Oculus (or the Supermedium browser)
As a result of this decision, this means that I have lost the following features which I had planned to make use of
- Ability to move through the environment
- Ability to use controller buttons / joysticks to control aspects of each Harmonograph presented (such as spin rates)
These have been replaced by use of fusing / gaze control, which is available as a default component in A-Frame - where the user can direct there gaze at a clickable object, and after a predetermined period of time a click event is generated. cursor component. This has meant the presentation of more controls on the screen than I originally wanted to have.
Design Concept
The overall goal of the application, is to allow the user to explore the mechanisms that will be used in the Harmonograph in 3D.
There are a a number of different audiences for this application;
- Myself as an artist - allowing a new level of exploration in my own work to better understand how it is working
- Those who wish to carry out a similar exploration as myself, and understand the complexities of multiple rotating entities
- Those who wish to just enjoy the aesthetics of my work, and enjoy what I hope are meditative qualities that it has
In addition for myself as an artist, it provides an opportunity to think about how these mechanisms might work in 3D, and if there is any benefit in pursuing physical or virtual works that explore this concept further - or if, as I half expect - it's true quality is in the translation of these 3d mechanisms to a 2D plane.
Starting from a relatively abstract point of view, it became apparent that using the structure of my essay on Defining a Testbed would actually provide something of a narrative structure to help the user explore greater levels of complexity, and provide ways of envisioning a number of different harmonographs in a virtual space.
World Design
The world design was iterated over the course of the build - and was to prove the substantial component of the build design. Early in the design process I identified that I wanted to display separate Harmonographs for each of the different levels of complexity - rather than modify a single one. This was partly led by a desire to make each element easier to build, but also, by creating a more defined world in which the user can visit each example - they should be able to more clearly identify that is happening.
The first version of this world design, was based on a round shaped plane, where the Harmonographs were positioned as though sculptures in a garden, with the user free to roam around it, and with additional portal components to allow the user to quickly move to the next or previous Harmonograph. This design become less attractive as
- Movement was not available for Cardboard users
- As the user could not move, this provided an opportunity to place the Harmonographs at differing points around them, as though in a circle. However the portal based idea of navigation, which resulted in a forced rotation of the users view felt overly jarring and took the user out of the experience.
As it became apparent that moving the user though the world, was not working as I had hoped, the next iteration of the world was to move to a more linear design, and rather than move the user - allow the world to move around them. Whilst this added certain challenges, it created a much more immersive experience, and was settled on as the final design of the world.
This design was somewhat influenced by the work Track which would also go on to inform some of the visual look of the application as well.
Because the world is now lined up in front of the user, this created a couple of specific problems which needed to be addressed.
- Seeing multiple Harmonographs in a line, was visually confusing
- It was not necessary or desirable to be rendering all the Harmonogrpahs at the same time
- Moving the world towards the user to advance to the next Harmonograph, means the user needs to pass through the space in which it sits - which is not ideal
- Space was needed for an intro section in which instructions can be provided.
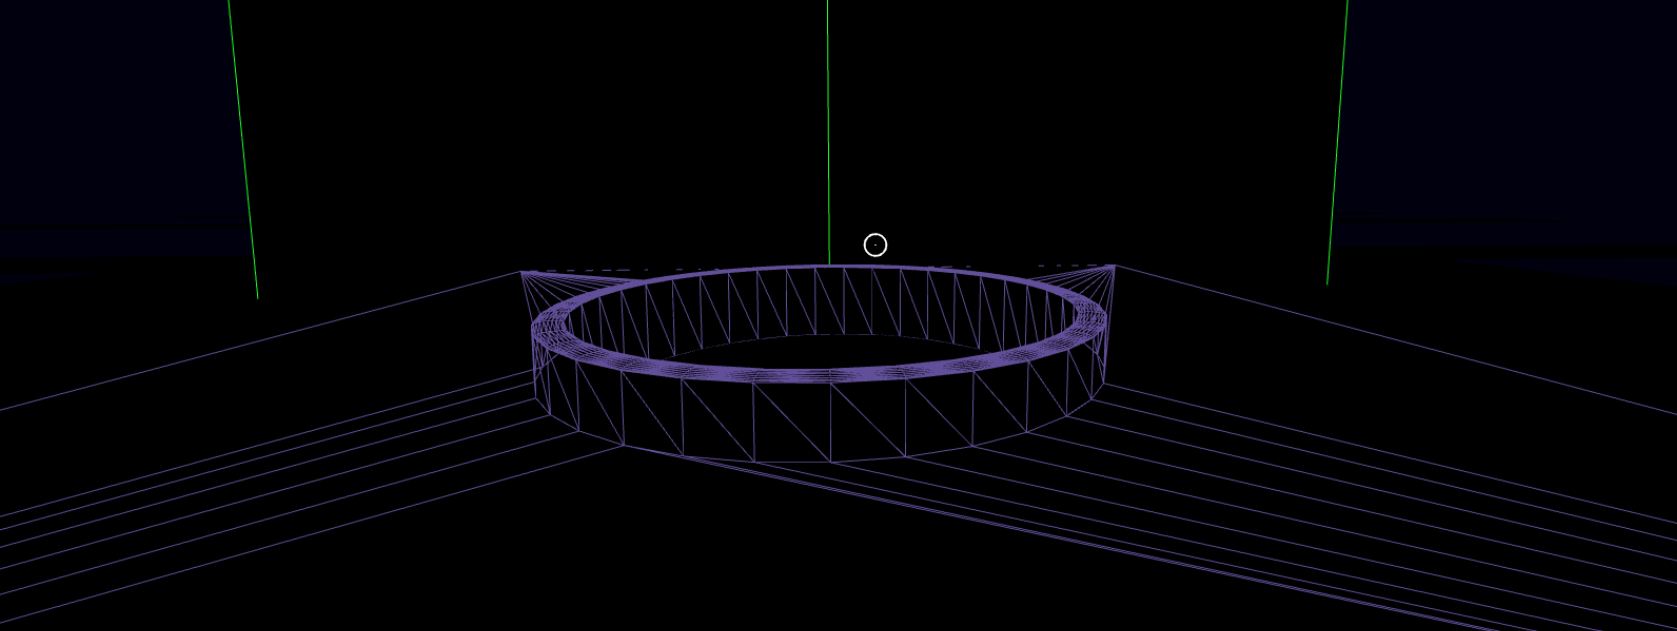
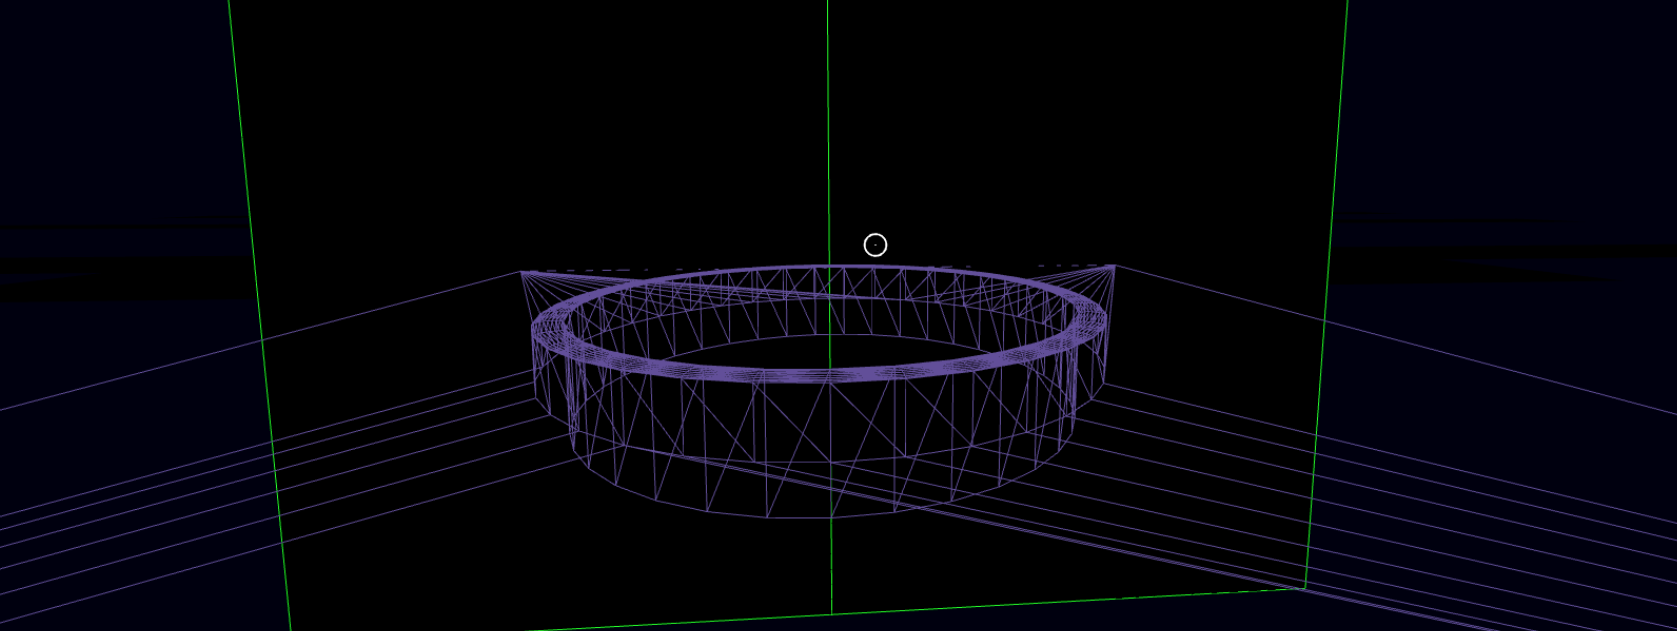
As a result of this, a 'portal' design was created for each Harmonograph section, alongside a 'viewing gallery' which would remain static. The key elements of each of these being…
- Creating a plane at ground level - under which each Harmonograph would be hidden until required to be shown
- Creating a plinth like structure, which would provide a reference point visually for each Harmonograph, as well as defining a hole in which the Harmonograph could be raised and lowered.
- Creating these in a form that would match the desired aesthetics
- Creating doors / curtains that would sit between the user and the rest of the content - these would then open as the world was translated towards the user, closing once complete enuring the user only saw the current Harmonograph
- Using the space of either side of the Harmonograph to provide controls for Navigation, and control of the Harmonograph (as seen in the previous image in the Hardware section)
Each Harmonograph section is built as a single mesh, which is the combination of a three LatheGeometry (to create the portal plinth) and simple plane - using the Earcut algorithm provided as part of threejs to correctly triangulate the join between a round base and plane. An example is shown below, rotated at 90º on the x axis to check that triangulation was working as expected. This object is built by the application itself at runtime - see the component groundplane as a BufferedGeometry object.
Because the visual design made of use of wireframe objects - rather than solid ones - this object alone would result in visibility of harmonographs hidden under it - therefore the component also creates a simple black plane slightly underneath it, to ensure nothing is seen that should not be. This plane is actually split into three parts, with the middle section again working like doors to open and close with the raising and lowering of the harmonograph. Lastly a a black tube geometry was placed in the middle of of LatheGeometry section, to clean up the appearance of this object.
Animation for the world motion was relatively straightforward - each transition to a new Harmonograph uses the animation component on the entity for the whole world, with different breakpoints for each Harmonogrpah that can be called separately. In addition, a list of other items are animated at each stage - for example raising and lowering the harmonograph, and the opening and closing of doors both those obviously visible, and those that were helping to mask unsightly content.
Visual Design
One of the key aspects of my research project, is looking at interesting and key points of early computer graphics - one such area I have always been fascinated are the graphics from vector displays - especially as featured on such Arcade video games, like Battlezone and Star Wars. This is especially relevant to the question in my research of "how much can you draw in the time allotted for a frame", and also I came to conclude a perfect fit for the nature of what I was trying to explore. Whilst ultimately that project will result in a very abstract output - I needed to clearly explain how it was put together. Wireframe / Vector style graphics tie into a a very clear style - where it is obvious what is being drawn. The use of textures, or more complex models would not have been appropriate - and would have had the danger of creating a distracting environment. The aesthetic deployed is to not just be in the virtual world - but to have a virtual air to it - as though one is looking at the construction of a larger whole.
This was relatively easy to make happen - with the main challenge being that whilst using materials with wireframe mode enabled, this does not result in any hidden line removal - for the majority of objects this is not an issue (and so far I've found that the Harmonographs actually benefit from wireframe materials) - however for some like the ground plane as previously discussed - additional solid materials were required to ensure that hidden lines did not become a distraction.
A Vector Font
Perhaps one of the most distinctive elements of any vector display based image, is the need to construct any text in a line based form - whilst this emulation of that type of display could no doubt handle more complex vector paths (and we can see this with the threejs TextGeometry object) - I wanted to evoke an older period. So created a simple vector font, where most characters can be drawn in around 6-8 lines.
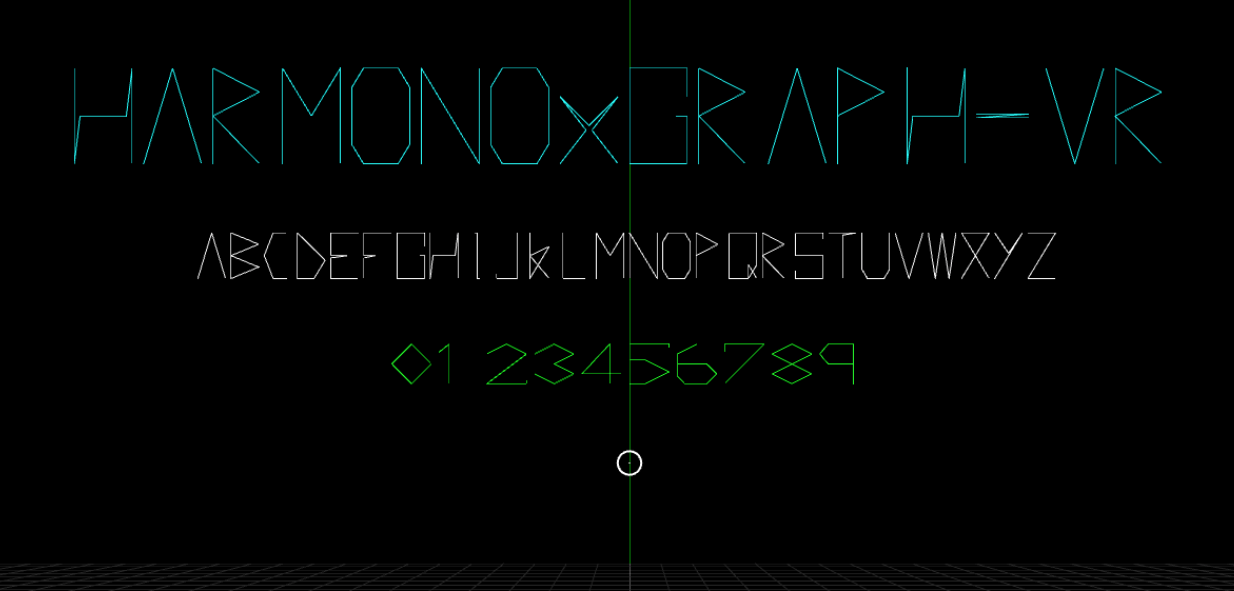
This was implemented as its own component with each character defined as an array of points, which are then correctly positioned and drawn in 3D space. This is currently a flat drawing of text (i.e. typically the depth value of each character is consistent) - it would be a useful addition to this to draw it as projected onto either the interior surface of a sphere / cylinder - thus allowing end ends of the text to be closer to the user than the center, but was left out of scope due to time constraints.
Creating a sky texture
For the earlier round plane design I thought a procedurally generated sky texture could be an interesting addition - channelling a little bit of the Battlezone look and feel, using cones to create mountains - however I realised this would come with a significant overhead - and for running on mobile, we do ideally need to limit the number of polygons rendered.
One way round this is to create a texture, used with the sky entity in A-Frame, this I did by creating a scene in threejs that allowed me to get the appropriate views to construct an equirectangular image. This was achieved by setting the camera's FOV to 90º and implementing keyboard controls that allowed the camera to be pointed exactly forwards, backwards, left, right up and down. Then taking screen shots of the resultant views, and using 360 Toolkit I was able to convert the cube map into the appropriate image.
The source code, and images can be found in the following post
However this design when used in practice was found to be somewhat distracting visually, as well as also increasing polygon counts due to the geometry of the spher it is projected onto. It was replaced by a simple background colour in the scene component
Implementing the Rotor Designs
Whilst implementing the rotor systems in threejs (specifically the react version I use with this site) was relatively straightforward, subtle changes in A-Frame and how it interacts with it's underlying Object3D instances presented some new challenges.
Both frameworks allow for the creation of trees of objects, allowing for matrix transformations on a child, and it's children. In threejs, this was easy to construct each object nested within a hierarchy, and using the appropriate update life cycle functions to change the rotational position of a rotor. This is less straightforward in A-Frame, as they recommend manipulating an entities threejs Object3D directly for such animation purposes, and not the attributes of that entity - meaning that child entities are not rotated accordingly.
Rather than take the performance hit on setting attributes I decided to make use of the fact that we can create 3d objects in a component, and create all the required child objects as well. By creating a rotor component to draw the whole system, and a sub-rotor component which can be attached to child entities in the scene definition - these can be read when the system is created, and recursively called for each sub rotor found - thereby creating the required links (as per a standard threejs implementation) but making use of A-Frames syntax for declaring child objects.
This also helps solve an issue with the way that entity visibility works in A-Frame, which again differs slightly - if you wish to make a node not visible - then any children are also not visible. Whilst sensible in many cases, this is not helpful when wanting to hide the rotor, as I still want it's children to be visible. By moving to direct three objects, in a component - rather than using A-Frame's wrappers on torus, sphere etc I was able to implement rotor hiding as required.
Interaction Design
The interaction design has proved to be an interesting challenge - with some specific issues that needed to be addressed, before looking at these the general requirements for interaction were as follows;
- The ability to navigate around the world
- The ability to manipulate key elements of each Harmonograph
Movement around the world, as already been partially addressed in World Design - specifically the additional challenges presented as a result of falling back to a Cardboard based headsets. How we trigger the portal like moves of the world, can also be considered in the following discussion of inteacting with each Harmonograph as discussed below - as effectively the same control mechanism was used.
Manipulation of the Harmonographs presents some interesting challenges - the main factors that are suitable for control are
- Spin rates of each rotor
- Visibility of rotor rings
It would have been possible and interesting to look at adding some sort of interactive Harmonograph builder where the user has complete control over all of the elements involved - for example being able to add and remove different elements - this however was placed out of scope, as it would have introduced a large amount of complexity, and in many ways was not quite the intention of this experience.
There are no obvious metaphors for control of these parameters - it would certainly be possible to look at using something like a rotation gesture to control spin rates - but this would still require some sort of control object to be present in the scene, as interacting with a rotor directly would be challenging due to it's continual movement. Though perhaps, some sort of laser control could have been implemented, to select a rotor = upon which it's movement is temporarily halted, then use a rotational gesture, or other input to change it's spin.
Because the main goal of this experience, is primarily visual, I decided that ideally any control should be purely within the controllers. Below is shown an initial mapping of the Vive controllers to key attributes (note this is not complete, following the move to a Cardboard environment).
| Object | Parameter | Control method | Keys | Notes |
|---|---|---|---|---|
| Common | Scene Selection | X, Y Buttons back and forward | 0 - 9 | |
| Master Spin | Right Joystick, L-R, slow to fast | -, + | Master rate, used for relative spin | |
| Object Selection | Left, Right Bumper | ;, ' | Walks through tree of objects | |
| Rotor | Size (diameter) | Left joystick, L-R (small to large) | <, > | Will change position of any child objects |
| Spin (x, y, z) | Right Trigger + Right Orientation | z, x, c | ||
| Spin (absolute, relative) | A Button to toggle between | a | ||
| Sphere /Cube | Size (diameter) | Left joystick, L-R (small to large) | <, > | |
| Number | Right joystick, L-R |
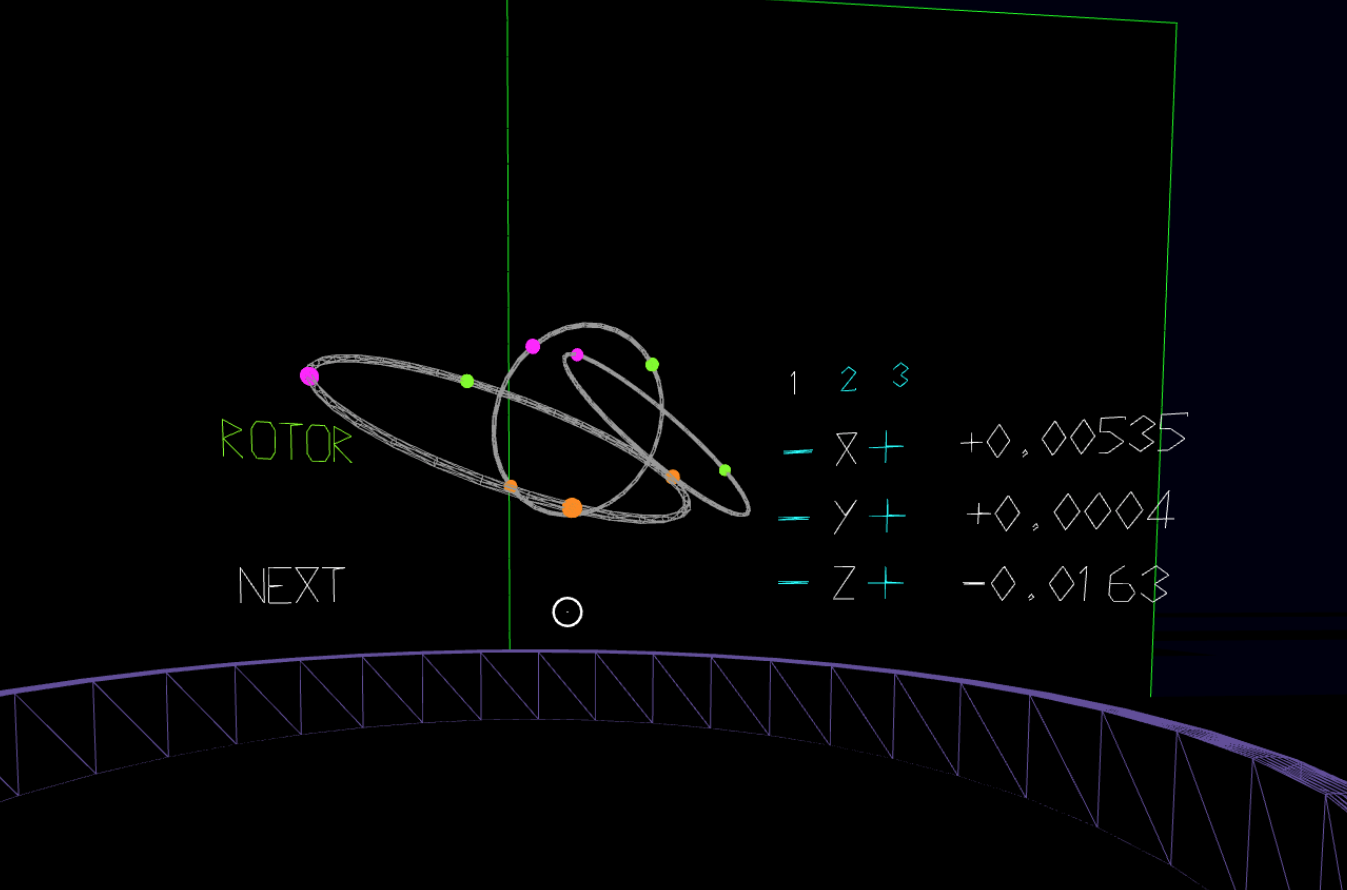
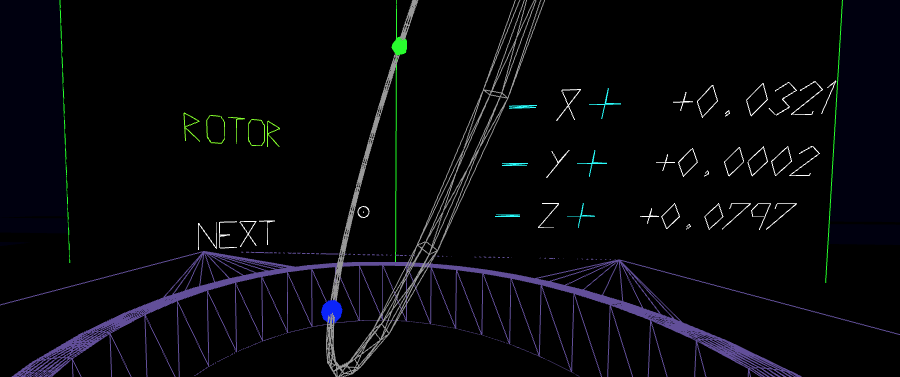
With the move to a cardboard headset, and gaze only control, a compromise was found thought the use of an on-screen UI, presenting text which the user can gaze at to adjust the parameters identified above - that is spin rates and rotor visibility.
Testing identified, that a better mechanism for highlighting objects which are clickable with gaze - the initial design had no consistency of clickable text appearance, and made the text slightly larger on initial engagement with the element via gaze (the mouseenter and mouseleave pseudo events in A-Frame terms). This was improved via the following steps…
- All texts that can be interacted with are the same colour ('cyan')
- Instruction added to the title screen that cyan texts can be looked at for interaction and navigation
- Text changes colour (to a deep pink) on mouseenter and back to normal on mouseleave events to better show interaction, which is better than the slight size change which was not always easy to identify
- Text briefly changes colour to white on the actual click event - then back to the appropriate colour, to help improve feedback on an event being triggered
Sound design
Although this is primarily a visual experience, there is I believe benefit in adding some degree of sound to the experience1. A-Frame provides for positional sound to be added to a VR experience. As there is something of the mechanical nature to the harmonograph, the original design anticipated using some sort of suitable white noise positioned at each harmonograph in the scene - possibly using something like the sounds in the following.
Unfortunately implementation of this became limited by constraints and by time - there are challenges in getting audio to play on iOS devices, as it requires a physical interaction, and fusing does not count as one2 - this has therefore not been added at this time - which is a shame, as I was looking forward to seeing how well this worked, and how moving between each Harmonograph - possibly having different sounds would enhance the experience.
Demo Video
The following video shows videos from the development of the experience and hopefully shows some of the iterative approach taken during development - for example early effort was focused on interaction, and world manipulation - hence the use of placeholder objects. It concludes with a short video of a user testing the application on a Google Cardboard device with an iPhone.
Testing feedback
Although I was only able to test with a single user directly in a VR context, I was able to get some good feedback - in this case the user had not much experience of VR at all, so this was a very new experience for them.
- Impressed with the level of immersion available
- Did manage to make themselves slightly dizzy at one point (as seen in the video), in conversation was identified was due to making the first harmonograph spin far too quickly.
- Found the world navigation comfortable, and a pleasant experience, did not feel especially limited in the environment
- Found the text based user interface very easy to use
- End of the experience was confusing (agan seen in the video - bar chart comment) - not surprising as it is only the first two scenes which are working.
- Did not necessarily find the ability to changes the spin rotation that interesting - a reasonable observation, as this may be something that different users enagge with in different ways
A couple of friends were able to test the experience in a standard 2D environment as well - and provided the following feedback
- Took a while to realise what the color cyan was - perhaps should pick a better color in the future
- Took a while to realise that could move phone to see the world, and interact with
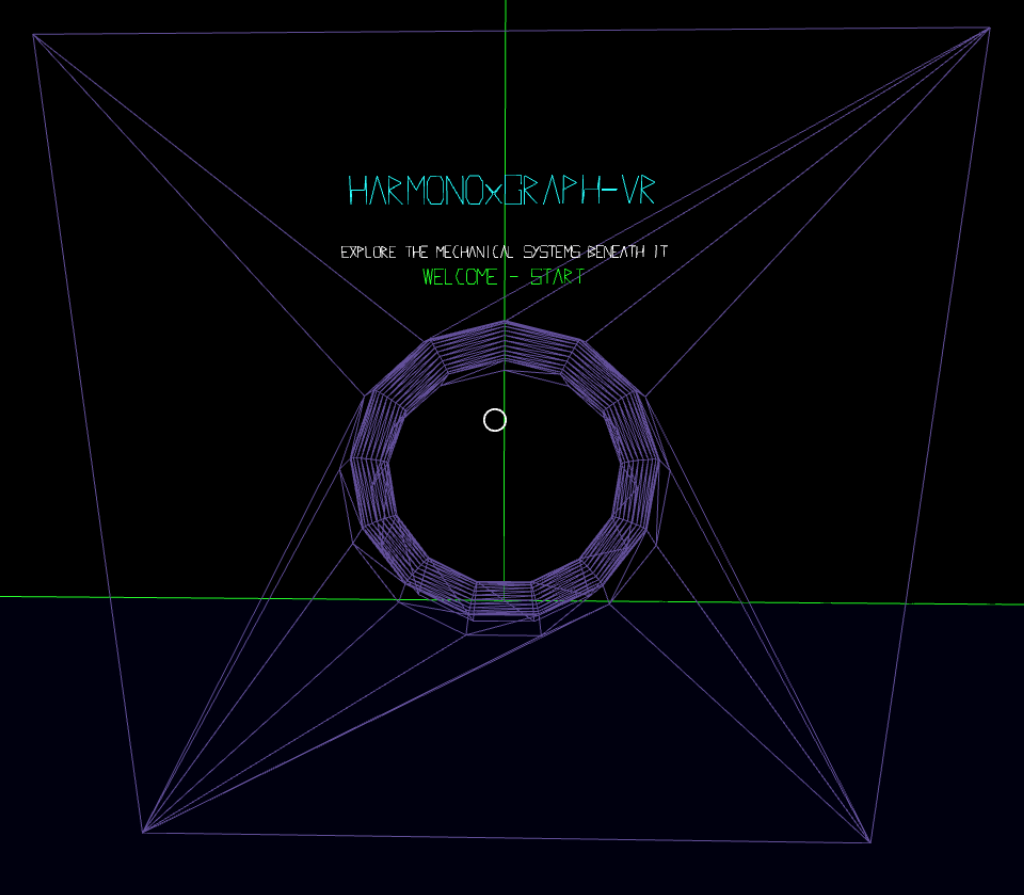
There is certainly a case for perhaps presenting the experience in a more defined context, with some sort of better - non VR base introduction to the experience. The previously mentioned Track threejs experience, which is also available in VR, does a particularly good job of providing a start page which then develops into the main experience. It would be good to find some sort of similar way of tackling this start - something I attempted but I believe is not as effective as it could be.
Conclusions
As an experience, I think the development has some levels of success - there are a number of areas which are imperfect, and a better experience could be created though addressing these. Below I have listed what I feel are the strengths and weaknesses of this work.
Strengths
The aesthetic and design are well suited to a browser based experience, especially on mobile - generally resulting in an acceptable frame rate with only the number of triangles being rendered, starting to push into upper limits using the A-Frame stats component. This also results in a very fast load time (as no textures etc are required) which works well in the scope of a web delivered experience.
The gaze based navigation and integration, after some modifications does work well - I had thought it may feel a bit clunky, but it's actually quite responsive and easy to use.
It is I believe an interesting experience - though perhaps at the level of a 'toy' and therefore only of passing interest, which is not an unreasonable result, as it's not designed to be an especially deep world which you may wish to return to over time.
A-Frame and threejs have been fantastic tools to develop with, and despite a couple of limitations found, a great way to creating content which can be easily shared, and experienced widely, including an ability to consume as a non VR experience.
Using Google Cardboard as a lowest common denominator has shown it's possible to still build a useful and viable VR experience
As an experiment to see if this type of motion still remains interesting in a three dimensional space - then personally I find it is still interesting, and it opens up the possibilities of exploring this 3D angle further in my research, as an alternative way of interacting with any eventual installation.
Weaknesses
Having to lower expectations down to a Google Cardboard was frustrating, as elements such as locomotion though the environment were a big loss to the experience.
Building a gaze / text based interaction interface took away time from other development activities, which had they been implemented as originally intended as directly linked to controls - as this would have required much less time to be spent on UI elements - which did prove somewhat problematic at times.
Scaling of the world and the Harmonographs, was difficult, and I believe is still not at an effective solution - it's been hard to find a sizing of things that feels right, as they should be presented with a degree of imposing size, but not feeling uncomfortable to view. I think this was especially effected by the loss of locomotion - as that would have allowed the user to find there own preferred view spots. It also presents the idea of creating a slightly more complex underlying landscape, such as providing hills and shallows to get very different vertical views of the content.
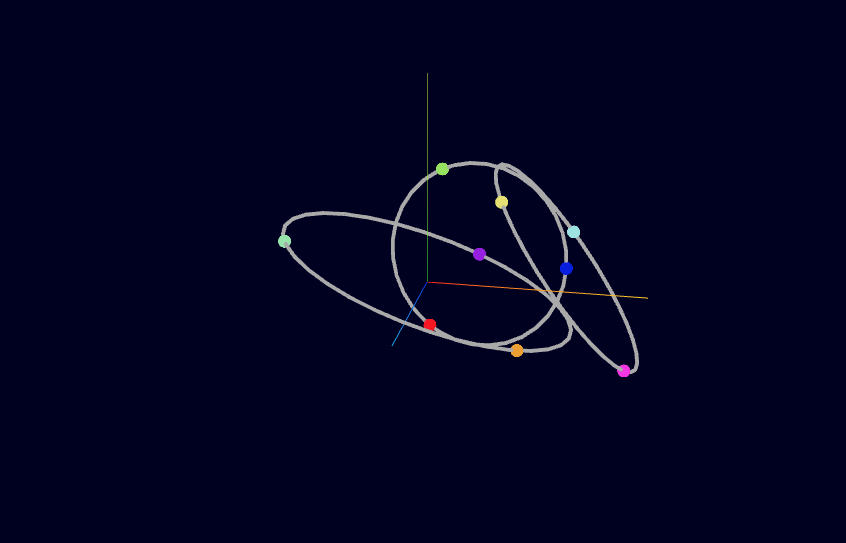
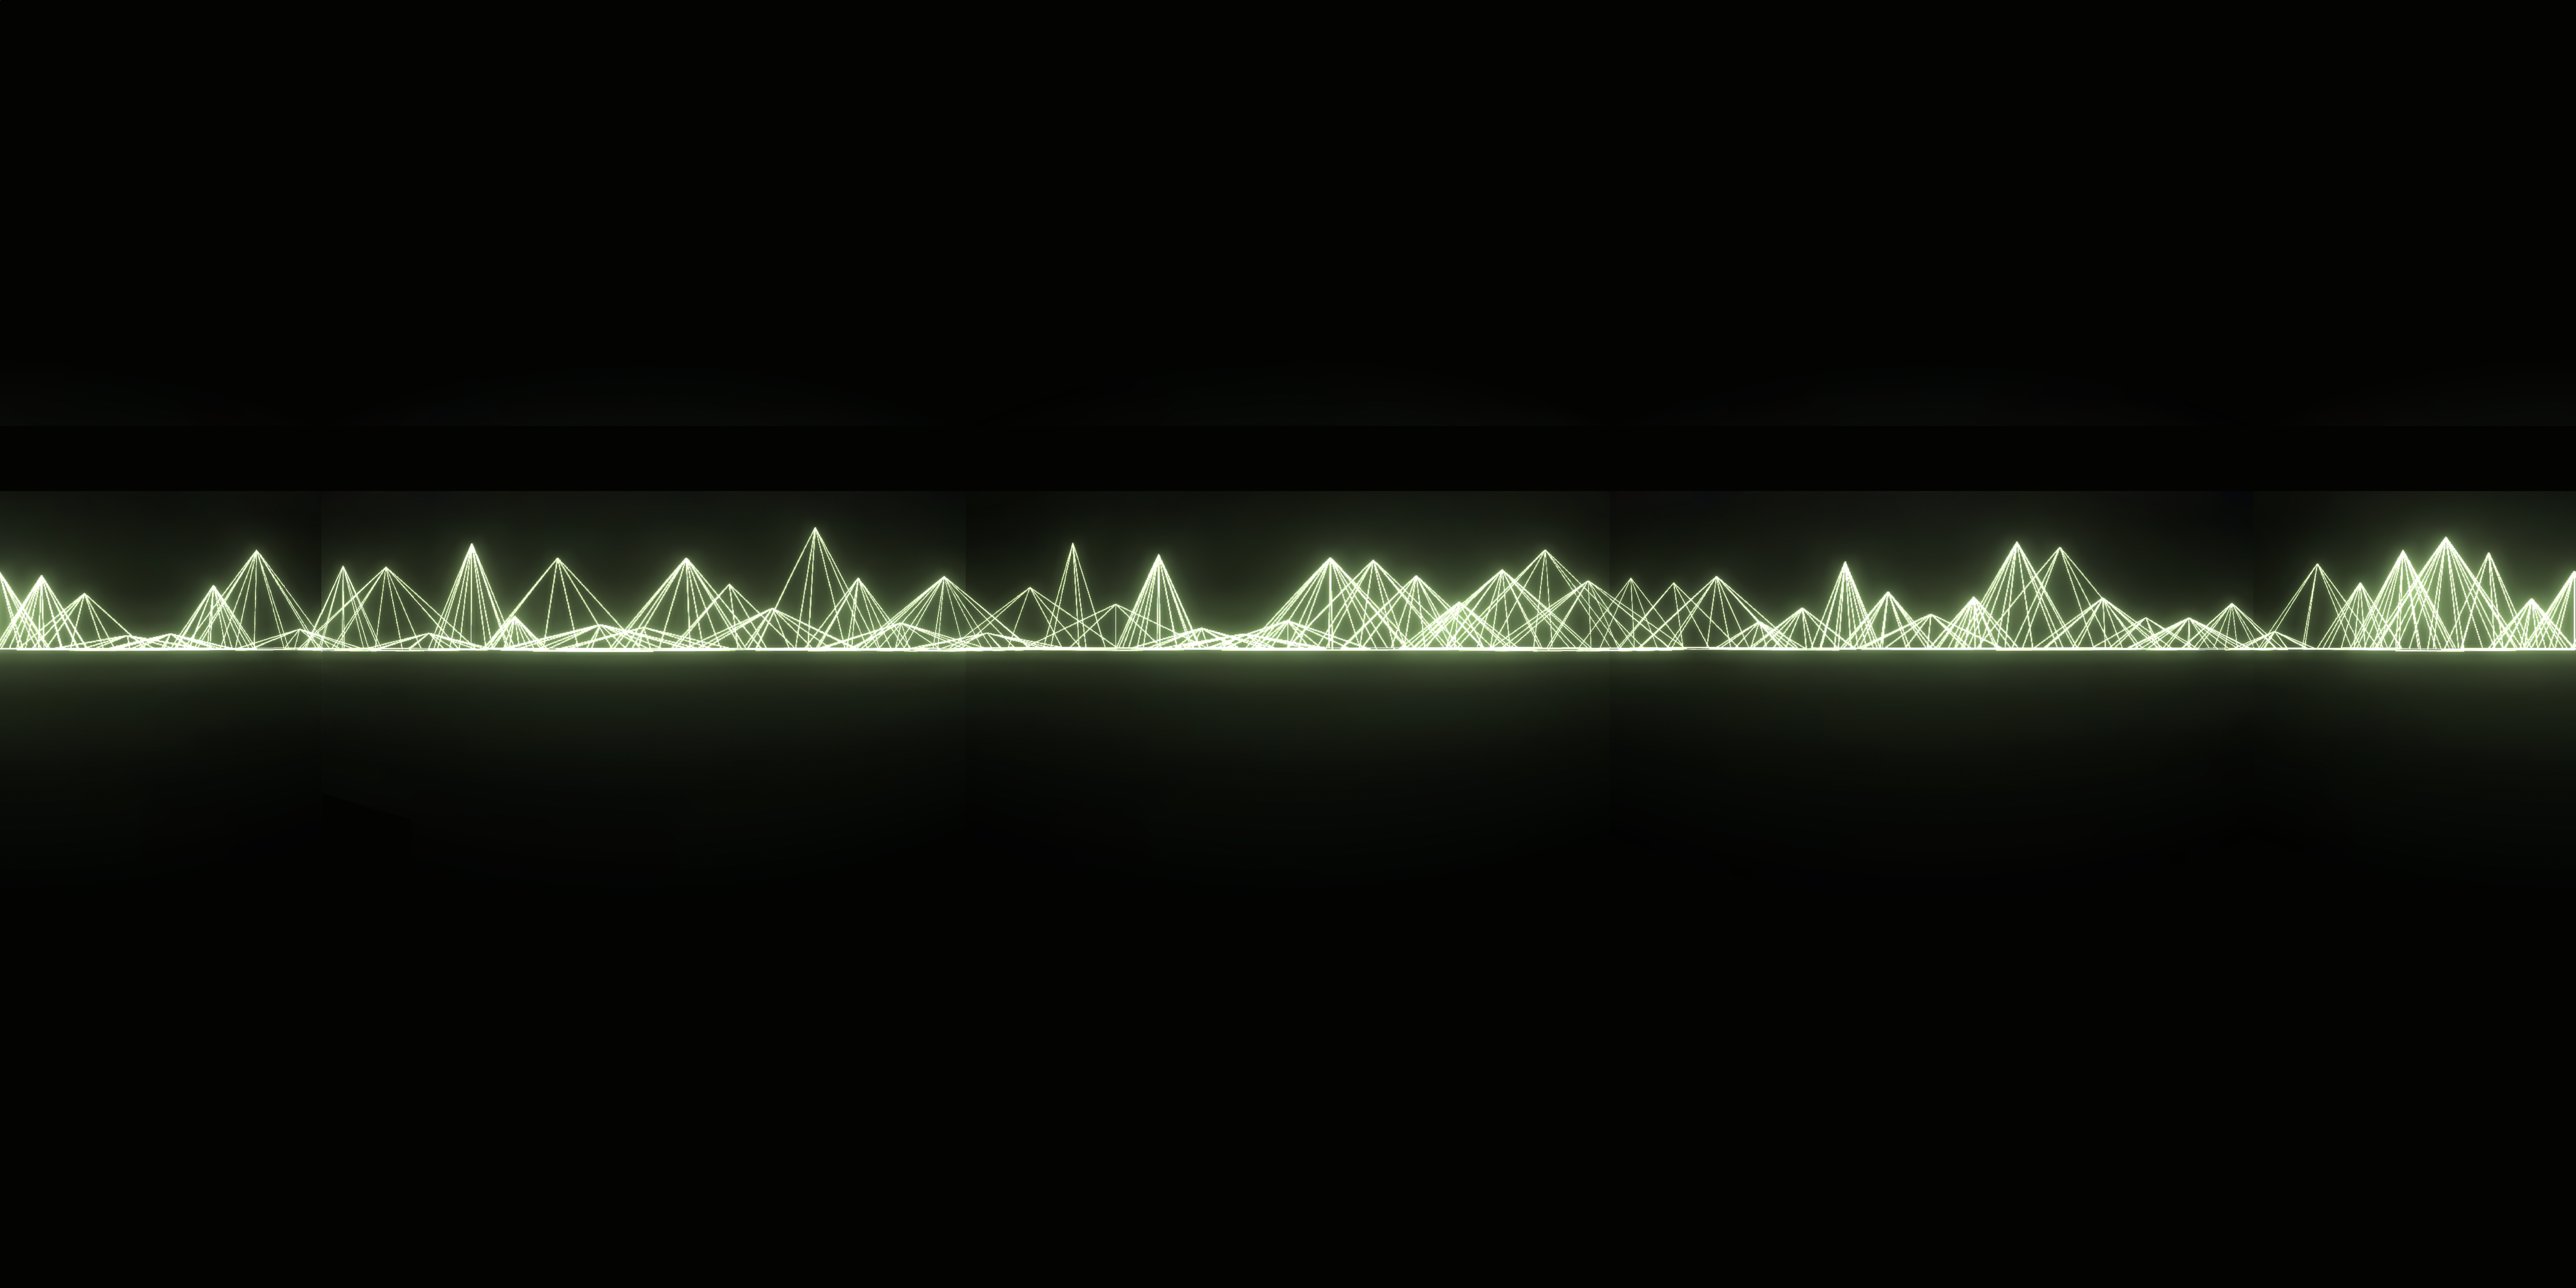
A-Frame (and threejs) are not currently setup to handle post-processing of images via shaders in VR (it's not currently setup to pass the appropriate data for each eye into the shader, and is currently under development in threejs), which is a disappointment, as for the more advanced rotor systems in the original blog, I made use of the unreal bloom effect to create an more pleasing effect, as seen below - in one of my favourite applications of this system.
/*

  File: tube.jsx
  Kind: ThreeJS canvas
  Description: Example of a single rotor in action, with dat gui controls

*/

import React, { useRef } from 'react';
import PropTypes from 'prop-types';

import * as THREE from 'three';
import { Canvas, extend, useFrame } from 'react-three-fiber';
import { RenderPass } from 'three/examples/jsm/postprocessing/RenderPass';
import { UnrealBloomPass } from 'three/examples/jsm/postprocessing/UnrealBloomPass';
import { OrbitControls, Effects } from '@react-three/drei';

extend({ RenderPass, UnrealBloomPass });

// Rotor as component
const Rotor = ({ position, rotation, spin, size, children, visible }) => {
  const rotor = useRef();

  useFrame(() => {
    rotor.current.rotation.x += (spin[0] / 3);
    rotor.current.rotation.y += (spin[1] / 3);
    rotor.current.rotation.z += (spin[2] / 2);
  });

  return (
    <group ref={rotor} rotation={rotation} position={position}>
      <mesh visible={false}>
        <torusGeometry args={[size, 0.5, 4, 32]} />
        <meshBasicMaterial color={0x666666} wireframe />
      </mesh>
      {children}
    </group>
  );
};

const Positions = {};

const Ball = ({ id, position, size, color, visible }) => {

  const ball = useRef();

  //const p = new THREE.Vector3();

  useFrame(() => {
    // console.log(Positions[id],ball.current);
    if (ball.current && Positions[id]) {
      const p = new THREE.Vector3();
      ball.current.getWorldPosition(p);
      Positions[id].unshift(p);
      Positions[id].splice(-1,1);
    }
  });

  return (
    <>
      <mesh ref={ball} position={position} visible={visible}>
        <sphereGeometry args={[size, 32, 32]} />
        <meshBasicMaterial color={color} wireframe/>
      </mesh>
    </>
  );
};

const Trail = ({ id, size, color, length, radial, segments }) => {

  const trail = useRef();

  Positions[id] = Array.from({length:length}, () =>  new THREE.Vector3());

  let d = 0;

  //Initial curve and tube
  const curve = new THREE.CatmullRomCurve3(Positions[id]);
  const tubeGeometry = new THREE.TubeGeometry(curve, length * segments, size, radial);

  const indices = tubeGeometry.getIndex();
  const vertices = tubeGeometry.getAttribute('position');

  //Update curve and tube
  useFrame(()=>{
    //new tube from updated points, then transfer vertices to current geometry
    const curve = new THREE.CatmullRomCurve3(Positions[id]);
    const tube = new THREE.TubeGeometry(curve, length * segments, size, radial);
    trail.current.geometry.setAttribute('position', tube.getAttribute('position'));
    trail.current.geometry.attributes.position.needsUpdate = true;
    trail.current.visible = (d > length);
    d++;
  });


  return (
    <mesh ref={trail}>
      <bufferGeometry attach="geometry">
        <bufferAttribute attach="index" array={indices.array} count={indices.array.length} itemSize={1} />
        <bufferAttribute
          attachObject={['attributes', 'position']}
          array={vertices.array}
          count={vertices.array.length / 3}
          itemSize={3}
        />
      </bufferGeometry>
      <meshBasicMaterial color={color} wireframe />
    </mesh>
  );
};

function Lights() {
  return (
    <group>
      <pointLight intensity={0.3} />
      <ambientLight intensity={10} />
      <spotLight
        castShadow
        intensity={0.2}
        angle={Math.PI / 7}
        position={[150, 150, 250]}
        penumbra={1}
        shadow-mapSize-width={2048}
        shadow-mapSize-height={2048}
      />
    </group>
  );
}

const TubeTrails = ({ running }) => {

  return (
    <Canvas shadowMap style={{ backgroundColor: '#000021' }} camera={{ position: [10, 20, 80], fov: 80 }}>
      {/* <axesHelper args={[75]} /> */}
      <OrbitControls />
      <Lights />
      <Rotor id="r1" position={[0, 20, 0]} rotation={[0, 0, 0]} spin={[0.000123, 0.00067, 0.01]} size={50} visible>
        <Rotor id="r2" position={[0, 50, 0]} rotation={[0, 0, 0]} spin={[0.01, -0.0001, 0.0775]} size={40} visible>
          <Rotor id="r3" position={[40, 0, 0]} rotation={[0, 0, 0]} spin={[-0.021, 0.075, 0.1275]} size={30} visible>
            <Rotor
              id="r4"
              position={[Math.cos(60) * 30, Math.sin(60) * 30, 0]}
              rotation={[0, 0, 0]}
              spin={[-0.001, 0.175, 0.5275]}
              size={20}
              visible
            >
              <Rotor
                id="r5"
                position={[20, 0, 0]}
                rotation={[0, 0, 0]}
                spin={[-0.021, 0.075, 0.1275]}
                size={15}
                visible
              >
                <Ball
                  id="r5b1"
                  position={[Math.cos(42) * 15, Math.sin(42) * 15, 0]}
                  size={1}
                  color={0x0089FE}
                  visible
                />
                <Ball
                  id="r5b2"
                  position={[Math.cos(137) * 15, Math.sin(137) * 15, 0]}
                  size={1}
                  color={0xF08918}
                  visible
                />
                <Ball
                  id="r5b3"
                  position={[Math.cos(221) * 15, Math.sin(221) * 15, 0]}
                  size={1}
                  color={0xFF190A}
                  visible
                />
                <Rotor id="r3" position={[Math.cos(221) * 15, Math.sin(221) * 15, 0]} rotation={[0, 0, 0]} spin={[-0.00021, 0.000075, 1.4275]} size={5} visible>
                <Ball
                  id="r6b1"
                  position={[5, 0, 0]}
                  size={1.5}
                  color={0x00FE01}
                  visible
                />
                </Rotor>
              </Rotor>
            </Rotor>
          </Rotor>
        </Rotor>
      </Rotor>
      <group>
        <Trail id="r5b1" size={1} length={50} segments={5} radial={6} color={0x0089FE} />
        <Trail id="r5b2" size={1} length={50} segments={5} radial={6} color={0xF08918} />
        <Trail id="r5b3" size={1} length={50} segments={5} radial={6} color={0xFF190A} />
        <Trail id="r6b1" size={1.5} length={80} segments={5} radial={6} color={0x00FE01} />
      </group>
      <Effects>
        <unrealBloomPass attachArray="passes" args={[undefined, 0.6, 0.3, 0]} />
      </Effects>
    </Canvas>
  );
};

TubeTrails.propTypes = {
  running: PropTypes.bool,
};

TubeTrails.defaultProps = {
  running: true,
};

export default TubeTrails;
Time spent on the project - for what I thought would be a fairly straightforward project it has taken much longer than I expected. As a result not all the Harmonographs were implemented, however I'm happy that the work required to implement those is related to things I've already done in threejs, and that all the significant VR related challenges have been addressed.
Also due to time, and headset restrictions, I haven't specifically tackled controller based interaction - given the opportunity and time, I would like to explore these, and further refine the experience in a more advanced headset scenario.
- From Building a Basic Scene - A-Frame ↩
- From sound - A-Frame↩